A new version of the Job Tracker application is available.
How to use it?
We’ll get you off to a good start.
Start by choosing your device.
If you have an iPhone, follow the steps for “iOS”.
If you have a Samsung or other device, follow the steps for “Android”.
Start
- Downloading the application from the Apple Store
Open your “Apple Store”, search for “Job Tracker 2.0”.
Click on “Download”. Please note: you may be asked to enter the password for your Apple ID or Google Play Store account at this step.
- Opening the application
Click on “Open” to open the application.
Select the desired language (Dutch, French, German or English).Tip: if you make a mistake here, you can always change the language later.
- Adding one or more employers
Click on “Add an employer” and then on “Next”.
3.a Connecting to Sodexo
Enter your username and password for Sodexo.
Ask your Aaxe employer for them if you don’t know these.
- Adding one or more employers
Click on “Add an employer” and then on “Next”.
3.a Connecting to Sodexo
Enter your username and password for Sodexo.
Ask your Aaxe employer for them if you don’t know these.
3.b Reading Sodexo’s instructions for use
Click on “Close” when you have finished reading the instructions.
- Adding a customer
The “Customers” window is displayed.
Click on “+ Add a customer” to add a customer.
4.a Customer contact details (video)
To add a customer, you need the following data:
-
- Customer number. If you don’t have this, please contact your Aaxe employer. (mandatory)
- Customer name (mandatory)
- Phone number (optional)
- Note (optional)
Click “Save” when you have entered all the necessary information.
- Adding an activity
Click on the desired customer. In this example it’s “Testing”.
Three new buttons appear.
Click on “Activity” to enter an activity.
5.a Encoding the activity data
- Ironing, Housekeeping or Shopping
- The duration (in hours)
- The payment method (electronic or paper)
When the data has been completed, the “Next” button changes colour. Check carefully whether all data such as customer, activity, duration and payment method have been entered correctly and then click “Next”.
5.b Confirming your activity
- In case of “electronic” payment
After you have checked all your activity data, you may click on “Encode activity” to confirm.
In case the data are not correct, you can click on “Edit activity” to modify them.
2. In case of “paper” payment
Your device may ask you for permission to use the camera.
SScan the service voucher to verify whether it’s valid or not.
This does not yet validate your activity. In order to validate your activity, you must bring your service vouchers to your usual Aaxe office.
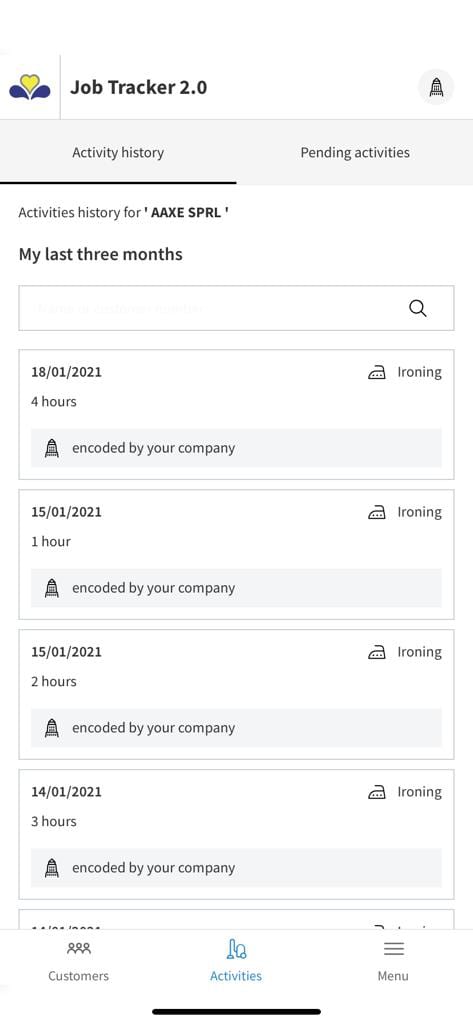
- Activities history
Open the “Activities” screen.
On this screen you can see the activities that were entered by you or for you by your employer.
- Pending activities
If you do not have an Internet connection you can save an activity to be validated at a later time. These activities are listed on the “Pending activities” screen.
- Changing your language
Open the “Menu” screen.
Here you can change the language used and the data related to your account.
- Changing your language
Open the “Menu” screen.
Here you can change the language used and the data related to your account.
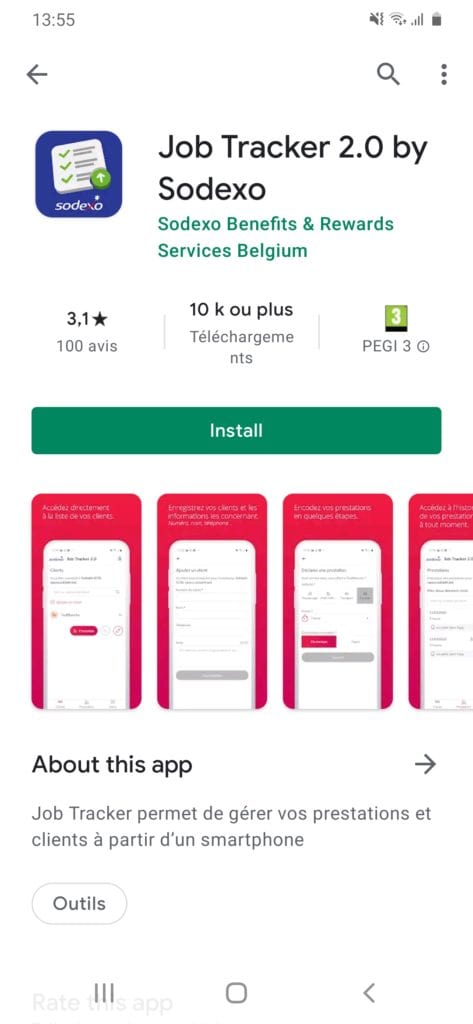
- Downloading the application from the Google Play Store
Open your “Google Play Store”, search for “Job Tracker 2.0”.
Click on “Install”. Please note: you may be asked to enter the password for your Apple ID or Google Play Store account at this step.
- Opening the application
Click on “Open” to open the application.
Select the desired language (Dutch, French, German or English).
Tip: if you make a mistake here, you can always change the language later.
- Adding one or more employers
Click on “Add an employer” and then on “Next”.
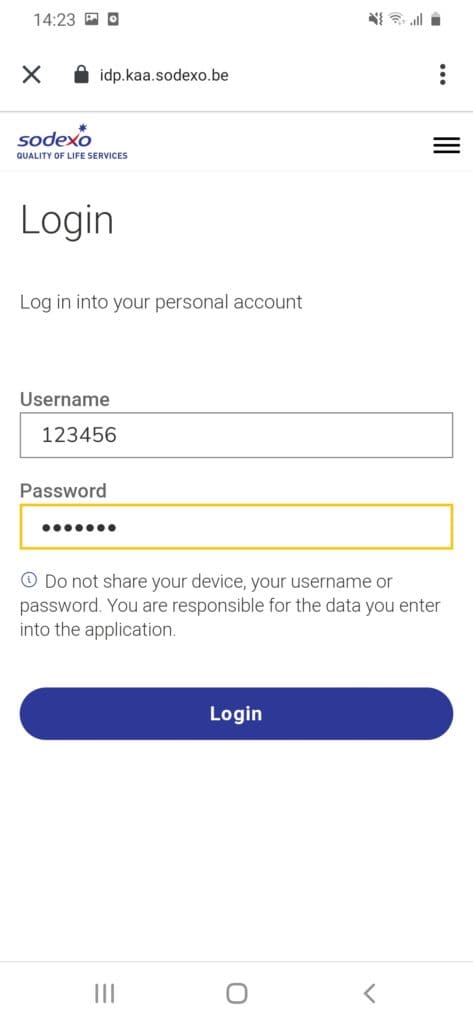
3.a Connecting to Sodexo
Enter your username and password for Sodexo.
Ask your Aaxe employer for them if you don’t know these.
- Adding one or more employers
Click on “Add an employer” and then on “Next”.
3.a Connecting to Sodexo
Enter your username and password for Sodexo.
Ask your Aaxe employer for them if you don’t know these.
3.b Reading Sodexo’s instructions for use
Click on “Close” when you have finished reading the instructions.
- Adding a customer
The “Customers” window is displayed.
Click on “+ Add a customer” to add a customer.
4.a Customer contact details (video)
To add a customer, you need the following data:
-
- Customer number. If you don’t have this, please contact your Aaxe employer. (mandatory)
- Customer name (mandatory)
- Phone number (optional)
- Note (optional)
Click “Save” when you have entered all the necessary information.
4.a Customer contact details (video)
To add a customer, you need the following data:
-
- Customer number. If you don’t have this, please contact your Aaxe employer. (mandatory)
- Customer name (mandatory)
- Phone number (optional)
- Note (optional)
Click “Save” when you have entered all the necessary information.
- Adding an activity
Click on the desired customer. In this example it’s “Testing”.
Three new buttons appear.
Click on “Activity” to enter an activity.
5.a Encoding the activity data
- Ironing, Housekeeping or Shopping
- The duration (in hours)
- The payment method (electronic or paper)
When the data has been completed, the “Next” button changes colour. Check carefully whether all data such as customer, activity, duration and payment method have been entered correctly and then click “Next”.
5.b Confirming your activity
- In case of “electronic” payment
After you have checked all your activity data, you may click on “Encode activity” to confirm.
In case the data are not correct, you can click on “Edit activity” to modify them.
2. In case of “paper” payment
Your device may ask you for permission to use the camera.
SScan the service voucher to verify whether it’s valid or not.
This does not yet validate your activity. In order to validate your activity, you must bring your service vouchers to your usual Aaxe office.
5.b Confirming your activity
- In case of “electronic” payment
After you have checked all your activity data, you may click on “Encode activity” to confirm.
In case the data are not correct, you can click on “Edit activity” to modify them.
2. In case of “paper” payment
Your device may ask you for permission to use the camera.
SScan the service voucher to verify whether it’s valid or not.
This does not yet validate your activity. In order to validate your activity, you must bring your service vouchers to your usual Aaxe office.
- Activities history
Open the “Activities” screen.
On this screen you can see the activities that were entered by you or for you by your employer.
- Pending activities
If you do not have an Internet connection you can save an activity to be validated at a later time. These activities are listed on the “Offline activities” screen.
- Changing your language
Open the “Menu” screen.
Here you can change the language used and the data related to your account.
- Changing your language
Open the “Menu” screen.
Here you can change the language used and the data related to your account.


